Tuesday, December 27, 2011

Buffalo Pork Tenderloin- Kick it Up a Notch!

Fire up the TAILGATE BBQ for this Beauty! All the flavors that you love in hot wings but injected into the pork, marinated, overnight and served with delish blue cheese dipping sauce and celery! It is so nummy! (That's a word right?  Nummy?) This is so infused with the flavors you love and baked to goodness! Served warm or cool it makes a great appetizer or summer BBQ too! (CHECK BELOW FOR A BITE SIZE APPETIZER RECIPE)
Oven Roasted, BBQ'ed or slow cooked in a smoker it's a winner!

Buffalo Pork Tenderloin

Special Tools : Meat Injector

1- 1 1/4-2 lb pork tenderloin
28 oz Franks Red Hot sauce

Inject meat with half of Franks Red  Hot varying location of injection.  Place tenderloin in plastic bag or casserole dish, covering with remaining hot sauce. Let sit overnight rotating or flipping bag.

OVEN - Preheat oven to 350 degrees. Insert meat thermometer into center of tenderloin, do not let it pass all the way through.  Bake for around 1 hour and 20 minutes, until tenderloin reaches 145 degrees. I like to throw a quick broil in for say 5 minutes to give a slightly BBQ'ed look. Let rest for 15 minutes before cutting and serving.

GRILL- I usually stick to a smaller cuts around 1 lb a piece and do two, Sear grill marks into pork, about 2 minutes each side. Wrap in foil, and grill over medium heat,  for 30 minutes, baste with sauce, and cook for 15 more minutes.  Should reach 145 degrees and have no pink when done.

Blue Cheese Dipping Sauce

4 ounces crumbled blue cheese
1- 1 1/2 cup mayonnaise
1 cup sour cream
9 ounces milk (optional)
1 tablespoon lemon juice (optional)
1 tablespoon Worcestershire sauce (optional)

KICK IT UP A NOTCH! 

Try roasting or BBQ'ing 1 inch cubes of pork loin in the same way! Serve skewered as an appetizer with Blue Cheese, Celery sticks.

Buffalo Pork Skewers
In a small bowl, combine the butter and 2-4 tablespoons of the hot sauce. Set both mixtures aside.

In a large bowl, combine the pork and an additional 2 tablespoons of hot sauce. Season generously with salt.

Marinate overnight if possible!

GRILL- soak bamboo skewers for at least a half hour. Thread the pork onto skewers and arrange over coals over medium heat for 10-14 minutes until no pink remains in the middle.  

OVEN- Arrange pork cubes on on prepared baking sheet. Broil for 4 minutes. Turn and broil until tender, 4 to 5 minutes. Remove pork from broiler and let rest at least 3 minutes. While pork is resting, brush both sides with the butter mixture. Stick party toothpicks or skewers in each one to serve. 

Monday, December 26, 2011

French Onion Soup

Deeply rich and brown, beefy broth, loaded with soft caramel onions, toasted bread, and cheese toasted smothering the soup in the melty goodness over individual terrines or bowls.
The secrets are threefold:
1. The more than impressive Prime Rib Beef Stock. That being said, don't shy away from making this just because you have pre-made beef stock on hand.
2. Cooking down the onions for 1 whole hour- Don't Skimp on this step.
3. Dry out your bread or bake until firm and will soak up the soup but not fall apart.


French Onion Soup

3-4 medium onions, halved lengthwise, then thinly sliced lengthwise
3 sprigs fresh thyme, or 1 tsp dry
1 bay leaves
1 teaspoon salt, plus 1/4-1/2 tsp for later
1 tbs sugar
1/2 stick (4 tbs) unsalted butter
2 tbs all-purpose flour
3/4 cup good red wine (burgundy, pinot gris), or dry white (I prefer the depth of red)
4 cups Prime Rib Beef Stock, or organic, reduced-sodium beef broth (32 fl oz)
OR
Vegetarian Version- Porcini or Mushroom Stock
2 garlic cloves
Few dashes of Worcestershire Sauce
6 (1/2-inch-thick) diagonal slices of baguette, toasted dry and firm
2 tablespoons finely grated Parmigiano-Reggiano
6-8 thinly sliced, or about 2 cup grated Gruyère cheese


Uncovered Cook onions, thyme, bay leaves, sugar and salt in butter in a 4- to 5-quart heavy pot over moderate heat, uncovered, stirring frequently, until onions are very soft and deep golden brown, about 1 hour. Add flour and cook, stirring, 1 minute. Stir in wine and cook, stirring, 2 minutes. Stir in broth and pepper and simmer, uncovered, stirring occasionally, 30 minutes.

While soup simmers, put oven rack in middle position and preheat oven to 350°F.

Arrange bread in 1 layer on a large baking sheet,  and toast. Turning over once, sprinkle with parmesan, continue to toast until completely dry, about 15 minutes.

Remove croûtes from oven and preheat broiler. Put crocks in a shallow baking pan.

Discard bay leaves and thyme from soup and divide soup among crocks, then float a slice(s) of bread(croûte) in each. Slice enough Gruyère (about 6 ounces total) to cover tops of crocks or bowls, allowing ends of cheese to hang over rims of crocks; Bake soups on tray for 20 minutes, then preheat broiler. Finish for a minute or two under the broiler to brown the top lightly. Grab pot holders, and serve immediately.


Tuesday, December 20, 2011

Cranberry Bliss Bars

A reinvention of Starbucks famous, delicious Cranberry Bliss Bar.  I sat there as the holidays swept past me eating that delicious, moist, sweet, Bar of Bliss, and a Breve latte, and it occurred to me I knew how to make them.
*Revised 12/23/11


Cranberry Bliss Bars
Cookie Base
3/4 cup (1 1/2 sticks) salted butter, cubed
1 1/2 cups packed light brown sugar
2 large eggs
3/4 teaspoon vanilla extract
2 cups all-purpose flour
1 1/2 teaspoons baking powder
1/4 teaspoon salt (optional)
1 cup dried cranberries, slightly chopped
4-6 ounces white chocolate BAR, coarsely chopped; pieces a bit bigger than an eraser head

White Chocolate Frosting
1/2 package(4 oz.) cream cheese, softened
1/2 tsp vanilla extract
1 1/2 cups powdered sugar, sifted
1 1/2 tsp Orange zest
4 tbs fresh juice from the zested Orange
1/2 cup dried cranberries
1 cup white chocolate baking bar, melted, separated into two 1/2 cups

Preheat Oven to 350 degrees F. Spray 13x9-inch oblong cake pan with nonstick spray, or butter lightly.
In a medium saucepan over low heat, melt butter. Remove from heat. Add the brown sugar and stir until smooth. Transfer butter & sugar into a large bowl, and let cool to room temperature. Beat in the eggs and vanilla. In a separate bowl, whisk together the flour, baking powder, And salt; gradually add the dry mixture to the butter mixture. Stir in the cranberries and white chocolate.

3. Spread the batter into the prepared pan. Bake for 18-21 minutes or until a toothpick inserted near the center comes out clean. Do not overbake. Cool completely on a wire rack.

4. Prepare the frosting: In a large bowl, use an electric mixer to beat the cream cheese, orange zest and juice, and powdered sugar until well-blended. Gradually add the melted white chocolate; beat until blended. Frost bars. Sprinkle with cranberries. Drizzle with remaining melted white chocolate. Cut into bars- square or triangle-shaped. Refrigerate for about 3-4 hours.  These may be served brought to room temperature, or slightly chilled.

Melting White Chocolate - I would like to say there is some romantic stove top double boiler way to melt white chocolate.. save yourself the frustration and stick with the microwave.

Put the chocolate in a microwave-safe bowl and microwave on medium-power setting for 15-30 seconds at a time, checking it each time. Then whisk it smooth.

Venison (or Beef) and Wild Mushroom Stroganoff


Though I make this recipe with venison backstrap, which is naturally very low in fat, you can easily make a delicious variation with beef tenderloin or even hamburger!
Creamy, saucy and delicious Stroganoff is thought to have its origins in old Russia. and brought abroad by soldiers returning from war.


I know that many people cook dishes like this one with canned condensed soup mixed, but I hope once you learn the trick of, 2 tbs butter and 2 tbs flour starter, starting a roux, you will never find reason to ever buy processed gravies, soups, or sauces again! It really is simple. Start your flour in a fat (butter, oil, or fat) and you will never find a lump again.

Venison and Wild Mushroom Stroganoff
30 minutes

1-2 lbs venison backstrap or tenderloin
OR
1 2 1/2-pound piece beef tenderloin or sirloin, well trimmed, meat cut into 2x1x1/2 inch strips
5 tbs butter
5 tbs flour, using 2 tbs first, and 3 tbs later.
1/4 cup ketchup
1/2 medium onion, finely chopped
1 pound wild mushrooms, or cremini
1 clove garlic
1 1/2-2 cups (12-16 oz) organic beef broth
2 tablespoons Cognac or brandy (optional)
2-3 tbs Worcestershire sauce, to taste
3/4 cup sour cream
1 tablespoon chopped fresh Italian parsley(optional)


12 ounces wide egg noodles
4 tbs butter
1 tablespoon paprika


Cut tenderloin strips or medallions. Pat meat dry with paper towels. Sprinkle with salt and pepper, and flour lightly with first 2 tbs flour. Heat oil and butter in heavy large skillet over medium-high heat. Once hot, working in batches, add meat in single layer and cook just until brown on outside, about 1 minute per side. Set aside.

Add 1 tbs olive oil in same skillet over medium heat. Add chopped onions and sauté until tender, scraping up browned bits, about 2 minutes. Add button mushrooms. Sprinkle with pepper and sauté until liquid evaporates, about 5-7 minutes. Add garlic in last minute. In the middle of skillet, clear an area and melt 3 tbs butter, and 3 tbs flour, letting it melt into each other. Remove all of the flour taste by browning lightly for about three minutes. Whisk in beef broth. Simmer until liquid thickens and just coats mushrooms, about 14 minutes. Stir in sour cream, Worcestershire . Add meat that was set aside, and any accumulated juices. Simmer over medium-low about 3 minutes. Season to taste with salt and pepper.

Meanwhile, cook noodles in large pot of boiling salted water until tender, about 8 minutes. Drain. Put back in pan, and add remaining 2 tablespoons butter; toss to coat. Divide noodles among plates. Top with beef and sauce. Sprinkle with paprika. Serve with finely chopped fresh Italian parsley.


Sunday, December 18, 2011

Grandma Rose's Diagonal Cookies

Christmas cookie recipes are plentiful, Diagonals are an adaptation of a recipe written by Rose Naftalin, a Russian immigrant, whose father passed away two years after their arrival in the US. Rose was a self taught baker that wanted to satisfy her husband, a lover of fine foods, who also died a short time after they opened their own Delicatessen during the Great Depression. Rose kept baking, supporting herself and children with Rose's Fine Food Shop.  Her food and baking gaining fans all over the nation, Rose finally retired after working 20 hour days.  She then wrote, "Grandma Rose's Book of Sinfully Delicious Cakes, Cookies, Pies...", as well as many other compilations of her recipes. I strongly recommend this cookbook.


Grandma Rose's Diagonal Cookies
Shortcake Cookie
1 cup (2 sticks) unsalted butter
1/2 cup sugar
1 egg yolk
2 1/2 cups all purpose flour
1/2 tsp salt
1/2 cup each Raspberry Seedless Jam, Apricot Jam ; and Solo brand Almond Filling

Icing
1/2 cup confectioners sugar
2 1/4- 1/2 tsp milk ( Should be thick not runny)

Preheat oven to 350 degrees. Spray or grease cookie sheet.

Cream butter and sugar until fluffy. Add egg yolk, flour and sugar. Mix completely,  roll dough into three parts, wrap in plastic wrap and cool for an hour.


Roll out one third of dough to about 1/4 inch thick in a long somewhat rectangular shape. (At first dough will be hard to roll out, but quickly become very pliable. Floor rolling pin as needed) Using a knife cut out  a long rectangle. Cut down the middle lengthwise making two 1 inch wide strips; saving irregular dough you cut off.  With a spatula carefully place strips on cookie sheet. Using leftover dough add and pinch a border of dough on each side of strip. (If you are short, I have illustrated how to use scraps to pinch into a border)
Fill between two sides of cookie with jam or almond filling.  Each 1/3 of dough will create 2 strips. Repeat steps with last two dough balls, one at a time.
Bake for 15-18 minutes or until just golden brown. Let cool completely.  Drizzle with icing. Cut diagonally.
Makes about 60 cookies.
Enjoy!

Friday, December 16, 2011

Creamy Horseradish Sauce and Three Additional Prime Rib Sauces

All of these sauces are outstanding, if not traditionally served with Prime Rib. Most can be prepared ahead of time and served alongside the tender beef. 


Creamy Horseradish Sauce

2-4 tsp prepared horseradish (according to your taste and heat preference)
OR
2-4 tsp freshly grated horseradish

8 ounces sour cream drained
(OR 1/2 good mayonnaise
and 1/2 cup sour cream )

2 tbs cup fresh lemon juice
1 tablespoons Worcestershire sauce
Dash of Salt

In a medium-sized bowl, combine horseradish, sour cream, lemon juice, and salt; thoroughly mix. Refrigerate until ready to serve.
Can be made 2 days in advance; covered and refrigerated.

Garlic Blue Cheese Sauce

3/4 cup heavy cream
3 medium garlic clove, thinly sliced
6 ounces blue cheese, crumbled
1 tbs lemon juice
Dash Worcestershire sauce
Freshly ground black pepper

In a medium-sized saucepan over medium-high heat, bring cream and garlic just to a boil. Lower heat and simmer until the cream coats the back of a spoon, approximately 5 to 10 minutes. Remove from heat.
Stir in the crumbled blue cheese. Season to taste with the pepper.
Can be made 2 days in advance; covered and refrigerated. Let sit for about 15-30 minutes at room temperature before serving. 

If you have any remaining whisk in 1/2-1 cup buttermilk for a delicious dressing!

Au Jus
10 minutes

Reserved Prime Rib juice, fat removed and used for Yorkshire Pudding
OR
2 1/2 cups beef stock, not cubes, containing no MSG
1 tbs Worcestershire 
Salt and pepper to taste
2 tbs flour
 3/4 cup good red wine (optional) 
Large pat of butter (about 1-2 tbs) 

Using a strainer or fat separating measuring cup separate beef fat and juices. Put 2 tablespoons of the fat in a pan and 2 tbs flour over medium heat. Stir and cook down 3-4 minutes. Add beef juices back into pan whisking as you pour.
Bring mixture to a boil and cook until the stock is slightly reduced, about 5 minutes. Au jus is not thick like a typical sauce or gravy.Season to taste with salt and pepper. Finally stir in large pat of butter to add gloss. 
Transfer to a gravy boat, or serve in small individual containers for each guest.

Reserve remaining beef fat for making Yorkshire Pudding.

Use any left over Prime Rib and Au Jus for making French Dip Sandwiches for the next day.

Apple Horseradish Sauce 
(Excellent Served with Panko crusted Pork Medallions)

  • 1/4 cup grated Granny Smith apple
1/4 low-fat plain yogurt
1/4 cup light mayonnaise
1 teaspoon Dijon mustard
1-2 tablespoons prepared horseradish

In a medium-sized bowl, combine apple, yogurt, mayonnaise, Dijon mustard, and horseradish.
Can be made 2 days in advance;  covered and refrigerated.

Monday, December 12, 2011

Chicken Parmesiana


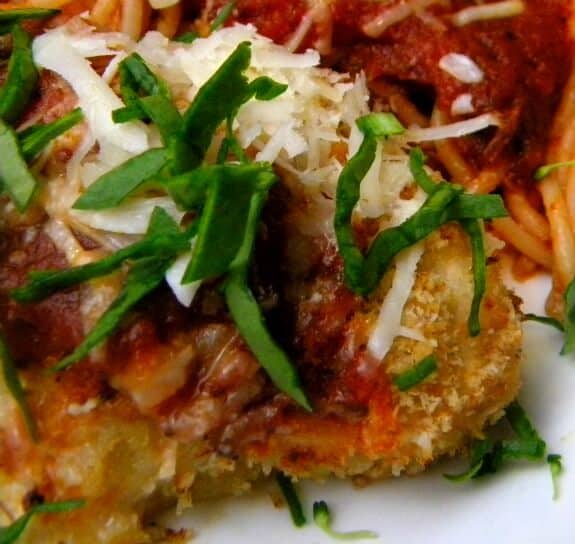
Chicken Parmesan is so satisfying, not only for the diners, but me as I hear "mmmmmm mmm" from every corner of the table! Really it's such a simple offering but the flavors never seem like you barely just entered, and now left the kitchen in 30 minutes!

Chicken Parmesiana
30 minutes

4-6 Panko Baked Chicken Breasts
        1 1/2-2 cups panko
        salt, pepper
        1/4 tsp garlic powder
        3/4-1 stick melted butter
4-6 Slices mozzarella, or buffalo mozzarella
2-3 cups Simple Tomato Sauce (Recipe Below), or pre-made marinara 
4 tsp Parmesan

Preheat oven to 450 degrees. Mix panko, garlic, salt and pepper. in flat dish. Pat chicken breast dry. Melt butter and dip chicken into butter then panko, pressing panko firmly to adhere. Bake for 30 minutes in oven proof dish or cast iron skillet.

Meanwhile, prepare Simple Tomato Sauce. In the last 5 minutes of baking, spoon sauce over chicken and lay a mozzorella slice on each breast. Sprinkle entire pan with parmesan.  Bake the remaining 5 minutes. Let sit for 5 more uncovered, and serve.

Depending on the season can be served over fresh greens with a lemon vinaigrette, in a toasted hoagy role as one of the best sandwiches out there, or  simply whole grain noodles and the remaining tomato sauce.

Simple Tomato Sauce

        1 jar (25 oz) Eden Crushed Tomatoes
        1/2 onion
        1/2 cup extra-virgin olive oil
        2 cloves garlic, chopped
        Sea salt and freshly ground black pepper
       1/2 tsp dried basil, thyme, and oregano
        2 dried bay leaves

Combine all ingredients in medium size pan. Bring to boil,  reduce heat to medium low. Simmer for 25 minutes at a low boil.

Oven Baked "Fried" Chicken

Super Moist, Crispy, Juicy Panko Baked Chicken, is one of my families favorite salad toppers, and starter to many an amazing, deeply enticing, winter feasts.

Have you heard of panko?  It's a Japanese bread crumb that is so amazing in retaining a light crispy coating! It uses very little, and still seems to coat the entire portion.  I use it exclusively now on fish, seafood and chicken.  It's available in most grocers, but I like to find ones with bulk food sections (read Winco) as it can be pretty spendy in specialty aisles.


Oven-Fried Panko Chicken
30-40 minutes

1 1/2-2 cups panko
1/4-1/2 tsp cayenne
1/2 tsp salt
1/4 tsp black pepper
1 stick (8 tbs) butter
1 chicken, 3-4 lbs, cut into pieces such as breasts, thighs, legs, etc.
OR
6 chicken breasts

Preheat oven to 450 degrees. Stir together panko, salt, black pepper, and cayenne pepper.

Whole Chicken pieces- Rub butter all over chicken pieces, dip in panko pressing firmly into to help them adhere.  Transfer skin up into baking dish or cast iron pan. Using a meat thermometer in deepest part of thigh, bake until 170 degrees or juices run clear, around 30-40 minutes

Breasts- Melt butter, dip chicken in butter and then coat thoroughly in bread crumbs. Place in baking dish or cast iron pan. Bake until browned about 30 minutes. Let cool for at least 5 minutes and serve.


Tomatoes OUT of the Can

An interesting post on Facebook by a friends inspired me to share... 


Rachel S. "SO, ever since I found out canned tomato products are basically poisonous it's really put a damper on my crock-pot cooking. bummer. i finally found a packaged tomato product that doesn't contain BPA, basically because it isn't canned. apparently almost all cans are lined with BPA and tomatoes absorb it like crazy due to their acidity. BPA's are especially bad for children, you don't want to eat them either...google it. i wish i had time to "make my own" but that's not an option. they're kinda spendy, but what good is saving a few buck if you're poisoning your family? too bad we can't count on the FDA to keep our food safe...in fact, if i keep reading about it, there won't be anything left for me to eat :("


She added that Pomi, http://www.pomi.us.com/ConsumerPerception.php, are currently packaging tomatoes in carton s that have No BPA! Check it out! Let's  hope this is a revolution in the whole industry! I'm actually truly impressed with the brand.. organic, nothing added(read salt) , straight delicious tomatoes! Not even Genetically Modified Seeds! 

Another all around incredible brand, one that is a little more local, and has an answer to almost everything that ails the food industry is Eden Organic out the Midwest. I love everything they make and they seem to truly think about the product they produce. They have excellent prices and of course the overall cost for a semi-local product is huge! Edenfoods.com They can  be found at Whole Foods and PCC. 

Info on BPA

As quoted by the Delicious Truth " 

BPA is an endocrine-disrupting chemical used in many plastics and aluminum cans, and according to Rodale News, is “linked to male infertility, diabetes, heart disease, aggressive behavior in children, and other ills.” (BPA is number six on Rodale’s recent “7 More Household Toxins You Should Banish from Your Home” list.)
BPA was always deemed essential in canned tomato products because of the tomatoes’ high acidity. For home cooks, this was troubling, as canned tomatoes are essential in tomato sauces, chilies, stews and other dishes. "


Interestingly BPA has been banned in baby bottles and baby products due to its proven health concerns, but still is huge in foods served to children and packaging! That to me is proof enough!

As the season arises I will also can my own! I make sauces and tomatoes aplenty.  I understand  it takes time, but seriously, its a half day.  The flavor, color and health, far out way the time, and the money saved.. well.. it's far better than couponing.  

Friday, December 9, 2011

Ganache Series- Salted Caramel Chocolate Tart

This is a remarkable alternative to the Chocolate Raspberry Truffle Tart...  Oh my Caramel. You are kind of my favorite.


Salted Caramel Chocolate Tart

Crust

1- 9 oz box Nabisco Famous Chocolate Wafers finely crushed
1/2 cup unsalted butter melted- 1 stick

Preheat Oven to 350 degrees. Spray a 11-inch loose bottomed tart pan with nonstick cooking spray.
Hand crush or process the cookies in a food processor, until finely crushed. Add melted butter and pulse in processor or mix until combined.
Pat the crust into prepared tart pan using a flat bottomed glass to build up the sides to 1/4 inch high. Bake for 12-15 minutes and let cool thoroughly on a wire rack.

Ganache
4 oz semisweet chocolate, finally chopped
1/2 cup heavy cream

Caramel
For the Caramel
1 1/2 cups granulated sugar
3 Tablespoons light corn syrup
1/4 teaspoon kosher salt
6 Tablespoons water
6 Tablespoons unsalted butter
6 Tablespoons heavy cream
1 Tablespoon crème fraîche ( a mixture of cream and buttermilk)

Flaked Sea Salt for Garnish- Should be Flaked for a light taste

Caramel-In a medium saucepan, whisk together the sugar, corn syrup, salt, and water. Cook, without stirring, until it reaches 350º F on a candy thermometer or until amber in color. Remove from the heat and whisk in the butter, cream, and crème fraîche (the mixture will bubble vigorously) until smooth. Return the caramel to a low heat and stir until any hard crystals melt. Pour the caramel into the cooled tart shell and cool slightly; refrigerate until firm, about 4-5 hours.

Ganache-Place chocolate in a heat proof bowl and bring cream to boil over medium heat. Pour over chocolate. Let sit for a few minutes then whisk together until smooth. Cool the ganache about a half hour at room temperature. 

Pour ganache evenly over caramel and refrigerate until set, about 4-5 hours. Allow tart to set at room temperature for 15-20 minutes (depending on how warm your kitchen is) before serving. Sprinkle the tart with flaked sea salt, slice, and serve chilled. Enjoy!


Adapted from a recipe by The Galley Gourmet

Ganache Series: Truffles- Holiday Decadence


Gift them, Eat them, Bring them to the party! These luxurious two ingredient deep rich chocolate pieces of heaven... Seriously just a roll in sack with some exquisite flavorings and this chocolate hits the toungue melts on contact and makes you fall in love all over again.
( see comments on ganache)


Homemade Chocolate Truffles

16 oz. Semi Sweet Chocolate Bar, Chopped into small pieces
1 cup heavy cream
2 tablespoons Grand Marnier, vanilla, almond, raspberry or any flavoring (optional)
1 teaspoon espresso powder

Cocoa powder, Coconut, Chopped toasted hazelnuts, Theo's Chocolate Nibs

Chop the chocolates finely with a sharp knife. Place them in a heat-proof mixing bowl.

Heat the cream in a small saucepan until it just boils. Turn off the heat and allow the cream to sit for 20 seconds. Pour the cream through a fine-meshed sieve into the bowl with chocolate. With a wire whisk, slowly stir the cream and chocolates together until the chocolate is completely melted. Whisk in the Grand Marnier, if using, coffee, and vanilla. Set aside at room temperature for 1 hour.

With 2 teaspoons, or I use a small scoop, spoon round balls, of the chocolate mixture onto a baking sheet lined with parchment paper. Refrigerate for 30 minutes, until firm. Roll each dollop of chocolate in your hands to roughly make a round ball. Roll in nuts, cocoa powder, or any flavorings you wish. These will keep refrigerated for weeks, but serve at room temperature.

For Nibs I like to roll a few into the truffle! Such a lovely tidbit in the middle.

Ganache Series: Basic Ganache Recipe

I have a love affair with ganache.  I find without a doubt the knowledge of a simple chocolate and cream mixture makes me a more decadent cook everyday.  It opens my options to ice a cake without a crumb in sight,  to make deeply rich and smooth love affairs with chocolate desserts, tarts, truffles that melt in your mouth! Chocolate Covered Strawberries, oh, and Molton Chocolate Cake! Cant forget that!
Its TWO, count them, two ingredients.  Nothing more.  Its warmed, its cooled.  That is all.  How can you go wrong?

A few words on ganache.

1. Dark and white chocolate are a bit more temperamental. Use semi sweet or ask if you want to try them! Ild love to tell you what I know!

2. Do not cool to quickly.  Let cool at room temperature for at least an hour before putting refrigerator.  Otherwise it looses its gloss.  Especially, if you are pouring into a tart or over a cake.

3. The addition of a small bit of espresso or coffee/espresso powder adds so much depth without actually influencing the taste!

4. Heavy whipping cream vs. whipping cream makes a difference. Use the heavy.

5. Use bar chocolate of excellence quality.  The others have fillers.  Do not use chips.


Basic Chocolate Ganache
7 minutes

16 oz. semi sweet chocolate bar- Use good quality. Organic is preferred. Chopped into small pieces
1 cup HEAVY cream


Chop the chocolates finely with a sharp knife. Place them in a heat-proof mixing bowl.
Heat the cream in a small saucepan until it just boils. Turn off the heat and allow the cream to sit for 20 seconds. Pour the cream through a fine-meshed sieve into the bowl with chocolate. With a wire whisk, slowly stir the cream and chocolates together until the chocolate is completely melted.
Pour over a cake, Make a Raspberry Truffle Tart, a Salted Caramel Chocolate Tart, Dip Fresh Local Strawberries, Make Truffles,  put a truffle inside Cake batter for a individual Molton Chocolate Cakes! Endless Ideas!

Sunday, December 4, 2011

Thai Massaman Curry- Beef and Chicken or Vegetarian

This Thai curry is unusual as it is not spicy or hot. Savory, deep, rich and creamy and melting with the most tender chunks of beef.


Thai Massaman Curry

2 lbs of beef, cut into 1.5-inch cubes (The tougher the better. I suggest a beef shank, or other bone in style roasts)
-OR-
Authentic Chicken uses thighs and bone in pieces.  I prefer a chunk so I use 2 lbs of boneless skinless chicken breast.  Cubed.
-OR-
Cauliflower(1 head broken into bite size pieces), New Potatoes and Chickpeas

2 cans good coconut milk
1 lb of waxy, potatoes like Yukon Gold or Yellow potatoes; cut into 2-inch chunks.
2 medium yellow onions, quartered
One 4-ounce can of Massaman curry paste, or to taste (1/2 can if like it mild)
2 tablespoons of prepared tamarind paste
2 tbs. Fish sauce, or to taste ( I know it sounds GROSS, but do not be afraid of fish sauce)
2 Tbs Palm, coconut, or brown sugar
1/3 cup dry-roasted peanuts

Optional add ins
7-8 lightly toasted white or green cardamoms, optional
1 teaspoon of lightly toasted cumin seeds, optional
3 Star Anise

Scoop out about 3/4 cup of the top, creamy part of the coconut milk and put in a large heavy-bottomed pot along with the curry paste. Fry the paste in the coconut cream over medium-high heat until the mixture turns into a creamy paste, bubbles up, and the coconut starts to turn oily.
Add the meat into the pot; stir to coat the meat with the curry paste. Add the remaining coconut milk and just enough water to barely cover the meat.
Turn up the heat just until everything comes to a boil; immediately lower the heat so that the curry is gently simmering. Cook, covered, until the meat is almost tender. The cooking time varies, depending upon the cuts of meat usually 1 1/2-2 hours. Beef shank, on the other hand, could take up to 3-4 hours. Chicken and cauliflower takes about 15 minutes so do with potatoes.
Check on the meat periodically. If more water is needed to keep the meat submerged, add it to the pot and restore the gentle simmer after each addition.

Add the onions and potatoes to the pot along with 2 tablespoons of fish sauce. You should add the onions and potatoes at the point where you feel it would take about 20 minutes for the meat to be perfectly tender. Add the vegetables before that point and they become mushy and fall apart by the time the meat is properly cooked. Add the vegetables after the meat has been perfectly cooked and by the time the onions and potatoes are tender, the meat will have been falling apart. This is the part where exact time requirement is not practical and common sense is necessary.
About 5 minutes before the potatoes and onions are ready, start seasoning the curry to taste with the tamarind paste, sugar, and extra cardamom and cumin, if desired. If more fish sauce is needed, add it now. Try to recall the taste of the version of Massaman curry which you like and keep seasoning it with tamarind, sugar, and fish sauce, and tasting until you achieve that flavor. (I like mine a bit on the sweet side with some tang.)

Serve with Coconut Rice and top with chopped peanuts.

Chicken Massaman

Hints: I do not suggest adding other vegetables or using baker potatoes as it affects the perfection of creamy taste and texture.  Also do not use lean and tender cuts of meat.  They will be mushy and ruin the Massaman. 

Coconut Rice


Easy Coconut Rice

21 minutes

1/2 tsp. coconut oil, OR vegetable oil
2 cups Thai jasmine-scented white rice (long grain rice like Jasmine is lower glycemic and wont send you into insulin shock like many other short grain and 5 minute varieties)
1 can good-quality coconut milk
1 3/4 cups water

2-3 Tbsp. toasted shredded unsweetened coconut (toast in a dry pan over medium high heat till browned. Remove immediately)
1/2 tsp. salt

1-2 Tbsp. toasted coconut for garnish

Rub oil over the bottom of a deep-sided pot.
Place rice, coconut milk, water, shredded coconut, and salt in the pot and set over medium-high to high heat. Stir occasionally to keep rice from sticking to the bottom of the pot and burning.
Once the coconut-water has begun to gently bubble, stop stirring and reduce heat to low. Cover tightly with a lid and let simmer 20 minutes, or until most of the liquid has been absorbed by the rice.
Replace the lid and turn off the heat, but leave the covered pot on the burner to steam another 5-10 minutes, or until you're ready to eat.

When ready to serve, remove the lid and fluff rice with a fork. Taste-test the rice for salt, adding a little more if needed. Serve right out of the pot, or transfer to a serving bowl. This rice is excellent served with a variety of both Thai and Indian dishes, such as curries or seafood recipes. If desired, top your rice with a sprinkling of toasted coconut and ENJOY!

Variation

Carribean Coconut Rice- Add one Cinnamon stick broken in three parts while simmers.  Remove and discard once ready to serve.

Friday, December 2, 2011

Mandarin Chinese Chicken Salad

Mandarin Chinese Chicken Salad

Light, refreshing, fresh, sweet, tangy, crisp and crunchy all at the same time! I can't resist! Loaded with grilled or BBQ'ed chicken this salad has the slight smokey flavor and the delicate mandarin sesame dressing!

This is so good! And frankly good for you! This is an all year salad in my house!


Under 30 Min.

SALAD COMPONENTS

2 cups baby spinach
2 cups shredded romaine
1/2 cup slice toasted almonds, or whole roasted salted cashews
2-3 fresh satsuma mandarin oranges, peeled and sliced (or canned sliced mandarins)
OR
1 navel orange peeled and and sliced
1/4 cup green onion, finely diced (optional)

2 cups shredded Smokey Beer Can Chicken -OR-
2-3 sliced Chicken Breasts- Simply Baked, Roasted or Pan Fried (I add a dash of cajun seasoning)

DRESSING
(In a jiffy I use Soy Vay Toasted Sesame Dressing found at most stores! It's Delicious!)

Zest of 1/2 orange (1/4 cup
1 tsp ginger
Juice of 1 orange(medium)
2 tsp sesame seeds
1 tsp crushed garlic
2 tsp sesame oil
1/3 cup rice vinegar
2 tsp sugar
1 tsp honey
1 tbs soy sauce

4 tbs canola oil

Mix all ingredients well with a whisk or blender. Slowly add oil to mixture.

Add lettuce and spinach to salad bowl or dish separately, and toss with dressing. Top with Chicken, Oranges, Almonds, and Green Onions. Serve and Enjoy!

The options are endless depending on what is in season! Even Sliced apples, diced dried apricots, fry up some crunchy wonton strips...

Thai Coconut Lemongrass Soup- Tom Kha Gai

This soup is made with nice size pieces of tender chicken, creamy coconut milk and broth. I have included the authentic ingredients as well as a the cheat version when your pantry is missing some of those ingredients.  This can be made any time of the year with a leftover chicken breast, turkey or by easily preparing some chicken and cutting or shredding.

This is my FAVORITE soup to kick a cold, especially the kind where nothing tastes good and you can't breathe. Lemongrass, chicken broth, the bit of zing to unplug your nose from the red pepper flakes! Yup! It's the one! I'm even known, if its a real whopper, to add a dash of chili oil.

Under 30 minutes

Thai Coconut Lemongrass Soup

1 quart chicken broth
1 1/2 C. coconut milk
1 cup sliced mushrooms (see authentic ingredient below)
1/4 tsp dried chile flakes, or to taste (see authentic ingredient below)
1 Stalk Lemongrass, cut into inch strips and lightly pounded
1 tsp freshly grated Ginger, OR 2 inches fresh ginger sliced into disk shaped slices (see authentic ingredient below)
2 1/2 tbs Lime juice
1/4 tsp Salt, or to taste
1-2 tbs brown sugar (optional)
1-2 cup pulled or cubed cooked Chicken (or white meat turkey)
1 Green Onion, chopped
Chopped Cilantro. Loosely chopped

Other Delicious Authentic Ingredients:
Straw Mushrooms (Found in a can usually) 
6 kaffir lime leaves (lightly bruised to release the flavor)
6 slices galangal, instead of ginger. A similar root, but not the same taste
8 bird’s eye chilies (lightly pounded), instead of dried red pepper flakes
3 tablespoon fish sauce(SUGGESTED)

Bring the stock to a boil, skim any foam that rises to the top and add coconut milk, lemongrass, lime juice, chile flakes, ginger, and chicken Simmer for about 15 minutes. Season to taste with salt. Ladle into soup bowls or mugs and garnish with cilantro and green onions.

Serve in a bowl with a side of steamed rice. (Traditionally this soup is served with the slices of galangal, lemongrass and lime leaves. I know many people who love to chew or enjoy them in the bowl. However if you do not like that or have a family member who doesn't you can strain or remove before adding chicken right at the end.)

Tuesday, November 29, 2011

Ganache Series: Chocolate Raspberry Truffle Tart

Fair Warning* This is probably the best, richest piece of chocolate heaven you will ever eat! You will dive into a small to medium size piece, but rarely be able to tackle a large piece. It will amaze your friends, impress your enemies. Don't say I didn't warn you. And it's EASY!


Chocolate Raspberry Truffle Tart
(Adapted from Bake it to the Limit, Dede Wilson)
25 minutes, aside from chill time. 5 ingredients.

Forming crust with a flat bottom glass
Crust
1- 9 oz box Nabisco Famous Chocolate Wafers roughly crumbled by hand or in
1/2 cup unsalted butter melted- 1 stick

Preheat Oven to 350 degrees. Spray a 11-inch loose bottomed tart pan with nonstick cooking spray.
Hand crush or process the cookies in a food processor, until finely crushed. Add melted butter and pulse in processor or mix until combined.
Pat the crust into prepared tart pan using a flat bottomed glass to build up the sides to 1/4 inch high.  Bake for 12-15 minutes and let cool thoroughly on a wire rack.
Arrange raspberries in the crust

Filling
15 oz semisweet chocolate, finally chopped
1 1/2 cup heavy cream
1/2 pint Fresh, LOCAL fall or summer raspberries (I especially love local fruit because it has the best flavor! You will be sorely disappointed by other berries) (reserve at least half  for latter in recipe)

Once cooled arrange berries on the cooled crust with small amounts of space around each berry around the entire crust. Place chocolate in a heat proof bowl and bring cream to boil over medium heat. Pour over chocolate. Let sit for a few minutes then whisk together until smooth. Cool the ganache about a half hour at room temperature. Then, pour the chocolate over the berries using a spatula if needed.

Let cool at room temperature for at least 2 hours then refrigerate until set, at least 6 hours, or overnight.  Let rest on counter for around 30 minutes before serving thin slices, plated with drizzle of raspberry sauce.

Raspberry sauce
1 cup raspberries
1/4 cup sugar
Lemon zest
2 squeezes half a lemon

Bring to boil over medium heat. Cook for 5 minutes,  I usually force through a wire mesh strainer with a spatula to remove most of the seeds.

Put back on stove over medium low heat.  Add 1 tsp corn starch and bring to low boil for 2-3 minutes.

Excellent variations: No raspberries? Consider a caramel layer below the chocolate, Caramel and Pecans, Hazelnuts and Caramel, Peanut Butter... the possibilities are endless!
Also individual tarts for friends, gifts, ladies tea, holidays and special occasions are darling and very indulgent!

Izzy thieves raspberries during the process!
Local Fall or Everbearing Raspberry Varieties
  • Heritage - 1969, developed in New York. Very winterhardy but ripens after September first.
  • Summmit - 1976, productive, small fruit, good flavor, some root rot tolerance.
  • Fallred - 1964, New Hampshire. Earlier than Heritage, better size,flavor and firmness.
  • Amity - Recent Oregon release similar to Fallred.
  • Autumn Bliss
  • Summit
  • Fall Gold (yellow fruit)
There are also several varieties of gold, purple, and black raspberries. Many are less productive and less flavorful. Some varieties of black raspberries are severely affected by diseases to which red raspberries are tolerant.

Summer bearing varieties:
  • Willamette - Earliest fruiting with large, dark berries. Industry standard from 1942 to 1970.
  • Meeker - 1967. Popular, late, large, firm berries suitable for mechanical harvesting.
  • Nootka - 1978. Short dark conical fruit, superior flavor to most varieties. Hard to find.
  • Tulameen - 1990. Very large, firm fruit with very good flavor.

Derived from Nootka:

  • Qualicum - 1996. Large fruit, good flavor, long shelf life reduces rots, fresh or processing.
  • Malahat - 1996. Earliest variety, large fruit, good firmness,flavor good, for fresh market.
Where to buy them! 
Pike Place Market
Farmers Markets
PCC
Whole Foods Market

Thursday, November 24, 2011

Chipotle Turkey, Bacon and Smoked Cheddar Panini

Spicy, Smokey, Cheesy, Crispy, Melty, Warm... 


Chipotle Turkey, Bacon and Smoked Cheddar Panini
8 slices ciabatta bread (or Italian)

Chipotle Mayonnaise
1/2 cup mayonnaise
1 -2 Chipotle Chilies
1/2 tsp honey

8 oz. sliced turkey, white meat
8 (1 oz.) slices Smoked Cheddar or Pepperjack cheese
8 slices pre-cooked bacon (See Perfect Oven Bacon)
8 slices tomato or Avocado
4 tablespoon olive oil

Combine mayonnaise, Chilies and honey in blender or food processor. Heat up panini grill, George Foreman grill, or skillet over medium heat.  Oil one side of bread. Slice Cheese, and tomato or avocado if you prefer. Place bread oil side down on griddle, smear bread with chipotle mayonnaise,  cheese, turkey, bacon, and add schmear other piece of bread with chipotle mayonnaise.  Placing on sandwich with oil side out.  Close grill.  If not a panini grill, add weight like a kettle or another pan. Cook until golden and melted. About 4-6 minutes. Enjoy!

Optional: Opt for thinly sliced red onions if you like them! Yum!

Homemade Turkey Noodle Soup

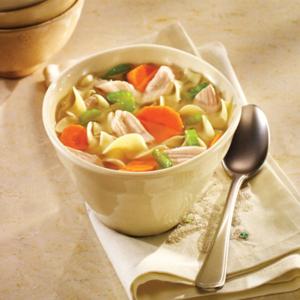
Turkey Noodle Soup is very traditional in many homes after Thanksgiving.  After the Turkey Broth slowly simmers for hours, the making of a delicious soup loaded with tender pieces of turkey, egg noodles, fresh carrots and celery is a wonderful, quick fix meal.

Turkey Noodle Soup
15 minutes or less

2 tablespoons extra-virgin olive oil
1 medium onion, chopped
3 garlic cloves, whole peeled
2 medium carrots, cut diagonally into 1/4-inch-thick slices
2 celery ribs, halved lengthwise, and cut into 1/4-inch-thick slices
4 fresh thyme sprigs, or 1 tsp dried
1 bay leaf
2 quarts turkey stock
8 ounces dried wide egg noodles
1 1/2 cups cooked turkey, cubed or shredded
Kosher salt and freshly ground black pepper
1 tsp fresh flat-leaf parsley, finely chopped

Place a soup pot over medium heat add olive oil. Add the onion, garlic, carrots, celery. Cook and stir for about 6 minutes, until the vegetables are softened but not browned. Add garlic, thyme and bay leaf in last minute Pour in the chicken stock and bring the liquid to a boil. Add the noodles and simmer for 5 minutes until tender. Add chicken, and simmer for another couple of minutes to heat through; season with salt and pepper. Sprinkle with chopped parsley before serving.

Leftovers Step 1- Homemade Turkey Broth

Waste Not, Want Not- Ok, conservatively I'm pretty frugal.  In actuality the reason I spent the time to make a broth, and pick the turkey clean of every bit of flavor; is because the delicious dishes created out of it are more than worth it in richeness and flavor with little effort. I admit being arm deep in a bird, post feast is not my favorite pastime. But the rich, enticing broth, the plates full of amazing sauces, sandwiches and soups is well worth the 30 minutes it takes me to glean every last morsel, and through the clean bird in a pot to simmer overnight.

Homemade Turkey Broth

1 turkey- most of the meat to removed from the bone to the best of your ability.  Turkey meat stored in containers for use in leftovers and later meals. (I usually separate the white and dark meat.)
2 stalks celery, sliced into 4 pieces each
2 carrots, sliced into 4 pieces each
1 Bay leaf
salt, about 1 tsp each
Whole Peppercorns, or
Onion from pan and that roasted in the turkey.
1 Large Pot

Optional Flavor additions:
Whole Cloves of Garlic
Fresh Parsley
Celery seed
1/4 tsp thyme

This is a very simple process.  A bit messy up front getting all the meat from the bird, but after that is done the process becomes effortless. Once the turkey has been cleaned of all its meat, put entire turkey, you may have to break it into smaller parts to fit, carrots, onions and celery into pot. Cover completely with water. Bring to boil, then reduce heat to Low and simmer for at least 4 hours. If doing overnight place in crock pot on the low setting for at least 10 hours. Feel free to remove any foam that appears on the top so broth remains clear. Once done using a strainer pour out broth catching vegetables, bones and tender meat from the bones in a colander. Putting broth either in storage containers for freezing or another pan to make turkey noodle soup!

Before freezing allow broth to cool on counter and/or refrigerate overnight.

USES: 
Soup Bases and Turkey Noodle Soup
Turkey Enchiladas
Turkey Pot Pie
Turkey Tetrazzini
Turkey Mushroom Risotto
Turkey Chili

Turkey Leftovers are Better than the Turkey Itself!

Thanksgiving leftovers are great! In fact its really the only time of the year that I can handle devouring a meal a second time around.  I know what more than a few plates of the original feast are consumed as the long weekend progresses, but what do you do when want to find new creations, new ways of seeing your turkey and sides, new ways to taste the perfection?

I have a few favorites:

Turkey, Cranberry Relish, Stuffing and Havarti Panini- A great way to eat all the flavors you love packing a warm, crispy sandwich. The Italian's version of a grilled cheese, but with a whole lot more! The options are endless here... some want stuffing, some smoked gouda, or even gravy!


Chipotle Turkey, Bacon and Cheddar Panini- Bacon, melted cheese, Crisp chewy bread, turkey... need I say more?


Turkey Noodle Soup- Nothing going to waste I boil the leftover turkey after I've stolen all the meat and make a wonderful broth. I freeze some in quart containers, and even in 8 oz. containers to use later. I always have enough left to make a big pot of turkey noodle soup to warm everyone up as the temperature drops!


Creamy Turkey Enchiladas
 My families favorite! Packs a flavor punch using the broth to make a creamy chicken Enchilada with a red sauce outside its the best of both worlds! And when they wary of the same flavors this Latin American dish really changes the pallet. Turkey Enchiladas